Capturing Videos and Images
Video and image capture can be started from the Capture menu or the equivalent buttons in the toolbar.
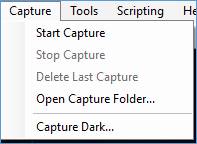
Start Capture
TheStart Capture menu item or toolbar button allows a custom capture limited either by number of frames or time to be started.
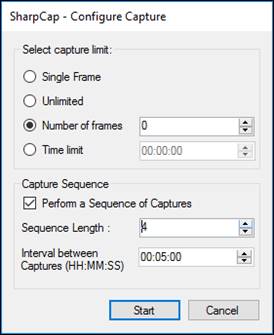
Capture Limits Explained
|
|
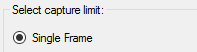
· Two files will be created – a single frame PNG or FITS, together with the camera settings TXT. · Upon completion of the capture, information will be displayed in the Notification Bar. · The files will be stored in the default capture folder. |
|
|
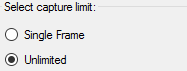
· Two files will be created – an AVI or SER, together with the camera settings TXT. · Note if a still file format is selected in the ‘Output Format’ control, multiple still image files will be created in a single folder instead of a single video file. · Upon completion of the capture, information will be displayed in the Notification Bar. · The files will be stored in the default capture folder. · The capture will continue until the Stop Capture button in the tool bar is clicked. |
|
|
· Two files will be created – an AVI or SER, together with the camera settings TXT. · Note if a still file format is selected in the ‘Output Format’ control, multiple still image files will be created in a single folder instead of a single video file. · Upon completion of the capture, information will be displayed in the Notification Bar. · In this example, the capture file will contain 5 frames. · The files will be stored in the default capture folder. |

|
|
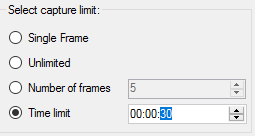
· A time limit can be set using HH:MM:SS. In this example 30 seconds is the limit set for the capture. · Two files will be created – an AVI or SER, together with the camera settings TXT. · Note if a still file format is selected in the ‘Output Format’ control, multiple still image files will be created in a single folder instead of a single video file. · Upon completion of the capture, information will be displayed in the Notification Bar. · In this example, the capture file will be a 30 second video. · The files will be stored in the default capture folder. |
|
|
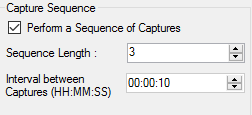
· This repeats the capture defined in the capture limit section above. · Note this option cannot be activated when the capture limit set above is ‘Unlimited’. · A sequence of captures, with an interval between them, can be initiated. · In this example, 3 captures will be taken, with an interval of 10 seconds between them. · Six files will be created – 3 AVI or SER, together with 3 camera settings TXT. · Upon completion of the capture, information will be displayed in the Notification Bar. · In this example, the capture files will be a 3 x 10 second videos. · The files will be stored in the default capture folder.
|
Once the capture options have been set, press the Start button to begin the capture or press the Cancel button to abort.
With large numbers of frames or extended time sequences it is advisable to use a guided telescope.
During a capture, the progress will be shown at the right-hand end of the Status Bar (bottom right of the screen).
![]()
Actual/Total frames and an estimated finishing time are displayed for the duration of the capture.
When the capture is complete, information about the status, location and name of the captured file is displayed in the Notification Bar below the Tool Bar.
![]()
The blue text in the Notification Bar is clickable and will go directly to the capture file/folder.
Stop Capture
Once a capture has been initiated, the Stop Capture option becomes available – this will stop the current capture immediately. Note if a sequence of captures is in progress it will only stop the current capture, not cancel the sequence. The whole sequence can be cancelled using the button in the notification bar that appears while waiting for the next capture in the sequence.
Delete Last Capture
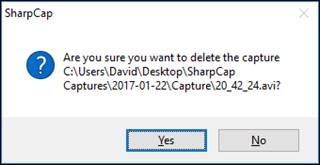
Once a capture has been completed, the option to Delete Last Capture becomes available. A confirmation dialogue window is shown, which is useful if a capture is taken accidentally or if something goes wrong during a capture.
Open Capture Folder
Open Capture Folder opens a File Explorer window at the location where captures are currently being saved. In a default configuration, this would normally be:
Desktop\SharpCap Captures\YYYY-MM-DD
Capture Dark
This menu item launches the SharpCap dark frame capture assistant – see Capturing and Using Dark Frames.