Configuring SharpCap
SharpCap configuration is carried out in the Settings dialog, which can be accessed from the File menu.
General Tab
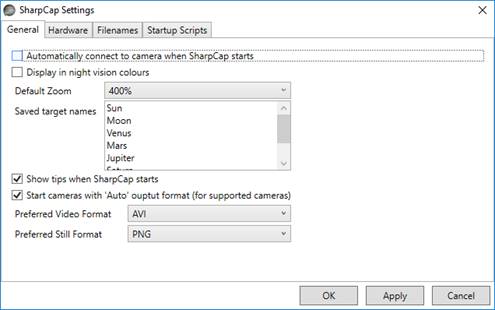
Automatically connect to camera when SharpCap starts
When set, SharpCap will automatically reconnect to the last used camera at start-up. If set, this setting can be overridden by holding down the Control key when starting SharpCap, which will skip opening a camera at start-up. This setting is enabled by default.
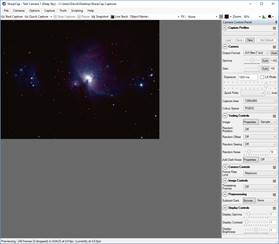
Display in night vision colours
This option is unchecked by default.
|
|
|
|
Normal vision (day) colours |
Night vision colours |
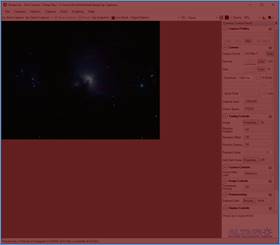
Use night vision to preserve dark adaptation of the eyes during a capture session if intending to observe visually.
Default Zoom
This option has a range of values from 25% - 800%; a sensible default would be 50%.
![]()
The Zoom setting gives the ability to zoom in or out of the image in the display area. This feature can be used to:
· Zoom in when searching for fainter objects.
· Zoom in when trying to place the FX Selection area over a single-star when using the Calculate Focus Score tool.
· Zoom out to reduce the image size displayed when Live Stack or Histogram are in use.
· Zoom out to reduce the image size displayed when capturing at higher camera resolutions.
The zoom value can also be changed using the Zoom tool on the Tool Bar.
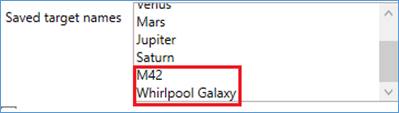
Saved target names
This option is a pre-configured list of object names. Objects can be added to the list or removed from the list and the list re-ordered.
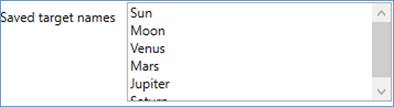
To add a new object, for example M42 or Whirlpool Galaxy, type the name anywhere into the Saved target names list. Click Apply to save the amended list. The amended list will be available the next time SharpCap is started.
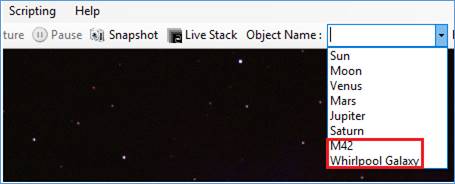
The list also appears in the Tool Bar near the
top of the screen under Object Name.
Objects added in Saved target names
will also appear in the Tool Bar dropdown
list.
Examples:
· Object Name undefined (the default), captures saved in folder: YYYY-MM-DD\Capture
· Object Name defined, captures saved in folder: YYYY-MM-DD\Object
· Moon selected as Object Name, captures saved in folder: YYYY-MM-DD\Moon
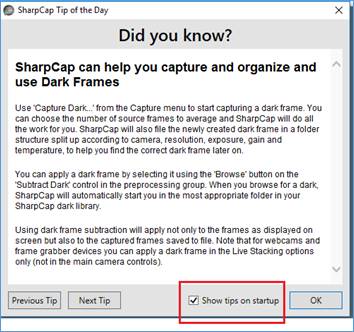
Show tips when SharpCap starts
This option is checked by default. The Tip of the Day appears when SharpCap is started but can be disabled for future start-ups here or when SharpCap starts.
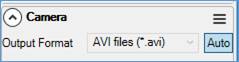
Start cameras with ‘Auto’ output format (for supported cameras)
This option is checked by default. For supported cameras, this option will set the Output Format control into Auto mode when a camera is opened. This does not apply to DirectShow cameras as they do not have an Output Format control.
Preferred Video Format
AVI is the default video format. This determines the auto selected format in the camera section of the Camera Control Panel.
|
|
|
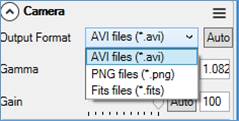
Preferred Still Format
PNG is the default still format. This determines the auto selected format in the camera section of the Camera Control Panel.
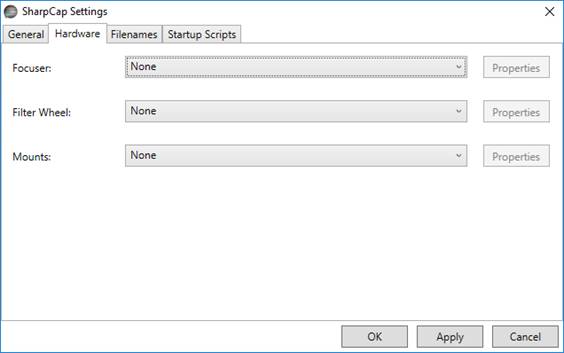
Hardware Tab
This is the hardware screen for a default SharpCap installation. The fields Focuser, Filter Wheel and Mounts all show as None.
This is the hardware screen when various ASCOM compliant hardware has been configured.
· This section will only need to be configured if a computer controlled focuser, mount or filter wheel is to be used from within SharpCap.
· The ASCOM platform must be installed to be able to select any hardware in this section.
· Ensure ASCOM drivers for the hardware are installed and configured.
· The ASCOM platform comes with a range of simulated hardware drivers that can be used for testing and experimentation.
Filenames Tab
This tab allows fine control over how captured images and videos are named and organised.
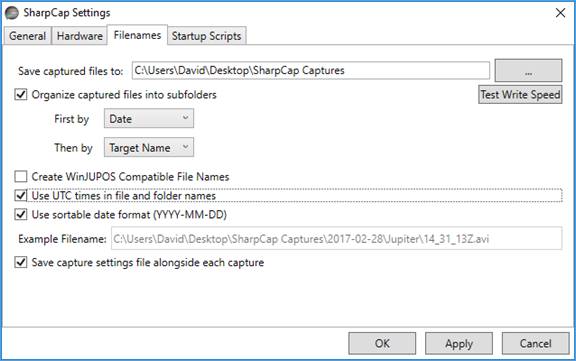
Save captured files to
This allows the top-level capture folder to be selected. All captured files will be saved into this folder or subfolders created within this folder.
The capture folder in a default installation will be on the logged-in user’s desktop and is called SharpCap Captures.
The browse button allows other capture folders to be selected or created.
Test Write Speed
This button will carry out a hardware performance test of disk write speed. Running this test will discover if the camera’s capture rates are being degraded by disk write speeds.
Organise captured files into subfolders
If this is unchecked, all captures will be saved in the top-level capture folder. When checked, captured files will be saved into subfolders according to the rules selected below.
Options and combinations for folder and file names are available. Sensible defaults are offered in the initial, default installation. Examples of using the options are given below.
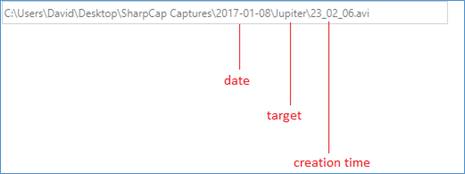
Date and then Target Name
Below is an example of a saved file organised by date then target name. File names are derived from the creation time of the capture and are in the format HH_MM_SS. Note the higher-level directory is named after the date and the inner directory named after the target.
Target Name and then Date
Below is an example of a saved file organised
by target name then date as seen in the Notification Bar
(green = success). Note the higher-level directory is named
after the target and the inner directory named after the
date.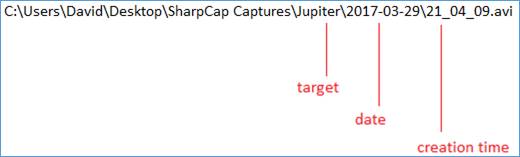
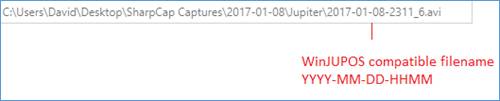
Create WinJUPOS Compatible File Names
Below is an example of a saved file using a WinJUPOS compatible name – a combination of date and time. This uses mid-point time in the capture for the WinJUPOS name. Using this option will make loading video files into WinJUPOS for de-rotation easier.
Use UTC times in files and folder names
When this option is checked, all dates and times used for filename generation will be UTC times. When it is unchecked, local times will be used.
Below is an example of a saved file using the UTC time format.
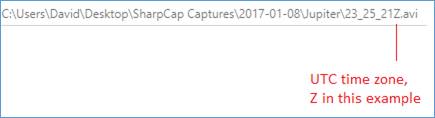
The letter designates time zone, Z = United Kingdom.
Use sortable date format (YYYY-MM-DD)
When checked, the date format YYYY-MM-DD will be used for all dates, making it easy to sort file and folder names in Windows Explorer. When unchecked, the date formatting rules appropriate to the PC’s regional settings will be used. This option is checked by default.
Save capture settings file alongside each capture
When checked, each capture file will, have an associated settings file saved with it.
|
|
|
|
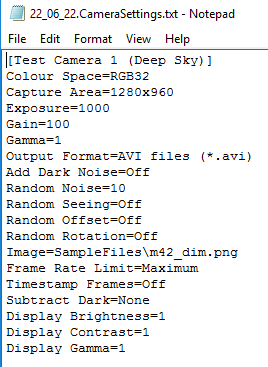
22_06_22.avi & 22_06_22.CameraSettings.txt
The text file to the right contains capture settings from the Camera Control Panel – useful for reference in future observing sessions or analysis during a post-processing session.
The name of the text file reflects the time of creation.
The captured data (video or still) and the CameraSettings.txt file will have the same timestamp in their filenames. |
|

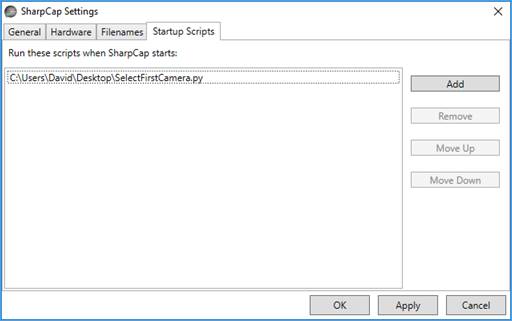
Start-up Scripts Tab
This tab allows a list of Python scripts, to be run at SharpCap start-up, to be configured. Such scripts can be used to add additional features or customizations to SharpCap every time it is started. Use the Add, Remove, Move Up and Move Down buttons to manage the list of start-up scripts.
For example, the following Script will create a button on the toolbar that selects the first camera when pressed. The code can be created and saved by following the information in Scripting.
def selectFirstCamera():
SharpCap.SelectedCamera=SharpCap.Cameras[0]
SharpCap.AddCustomButton("Test", None, "Select the first camera",
selectFirstCamera)
Save the script somewhere (call it SelectFirstCamera.py for example), say on the desktop and configure File > SharpCap Settings > Startup Scripts accordingly.
Deselect the camera, restart SharpCap and the button Test should be added to the right-hand end of the Tool Bar, together with the camera having been selected.
![]()
This technique is good to use for the start-up script as it allows creation of custom toolbar buttons and have them load every time SharpCap is started.
The Test button can be removed via File > SharpCap Settings > Startup Scripts, highlighting the script SelectFirstCamera.py, selecting Remove and restarting SharpCap.