Capturing and Using Dark Frames
Images taken with digital cameras can suffer from noise caused by the camera sensor and electronics. Dark frames can be used to counteract the effect of this noise on image quality. A dark frame is taken with the camera lens (or telescope) covered to ensure there is no light – this means any signal in the dark frame is due to noise. Once a dark frame has been created, it can be subtracted from each image frame to remove much of the noise. The dark frame must be captured under identical conditions (such as exposure, gain, resolution, temperature) as the image frames for the noise to cancel correctly.
Some cameras have a Peltier thermoelectric cooler attached (a fridge on the back of the camera) to combat noise generated by heat from long exposures.
Camera Noise
Below are examples of camera noise.
|
|
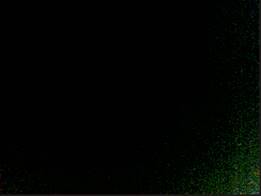
Amp glow in bottom right-hand corner – image produced with a webcam. This amp glow can be removed from an image by using dark frame subtraction. |
|
|
Thermal noise – image produced with a colour astro video camera. This thermal noise can be removed from an image by using dark frame subtraction. |
|
|
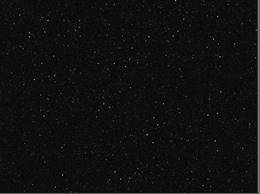
The brightest dots are hot pixels – produced with a monochrome camera and a high gain setting. With a colour camera, the hot pixels would appear as differing colours. These hot pixels can be removed from an image by using dark frame subtraction. |

A dark frame is captured to subtract it from later frames, to remove as much of the camera noise as possible.
Dark Frames Explained
SharpCap can capture a dark frame – the result being stored in the default capture folder under darks.
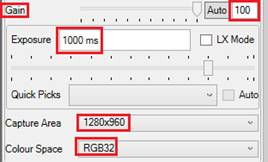
The dark frames must be captured using the same resolution and colour space as the image about to be captured. The same exposure and gain values should be used for the darks as for the captured images and ideally the temperature of the camera sensor should be the same to ensure the noise in the dark frame is as far as possible the same as the noise in the light frames
SharpCap can subtract dark frames for DirectShow cameras within Live Stack, for other cameras this subtraction is carried out in the Camera Control Panel or with post-processing software. Below is an example of the dark frame subtraction process and how it impacts the final image.
|
|
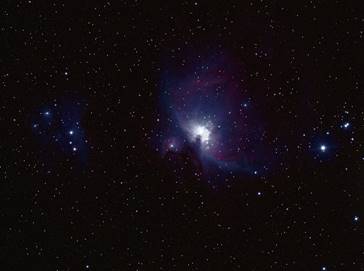
Captured frame
Initial image from the camera, showing noise (magnify document to see the noise more clearly). |
|
|
Subtract |
|
|
Dark frame
Dark frame image generated by SharpCap. The camera must be capped off or the cover put on the telescope to generate this. |
|
|
Equals |
|
|
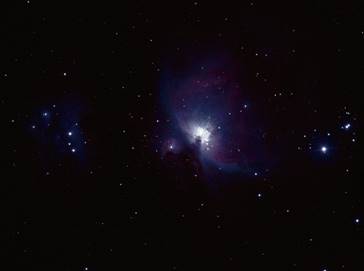
Final image
Most of the camera noise has been removed. The subtraction of the dark frame is done within SharpCap. |

Capture Dark Dialogue
This subsection explains the process for capturing and saving a dark frame. The process is started from the main menu via Capture > Capture Dark. The telescope or camera must be covered to exclude any light before commencing the dark frame capture.
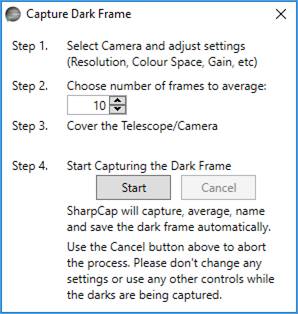
While the Capture Dark Frame window is open, do not use any SharpCap functions. Additionally, while the darks are being captured (after pressing the Start button), do not adjust any camera controls. Once the window closes, the dark frame capture process has completed.
Using the Test Camera 1 (Deep Sky) and the settings above (10 frames), a folder structure is created. The folder structure represents the camera settings in the Camera Control Panel.
|
|
|
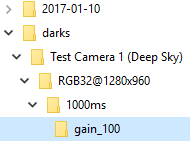
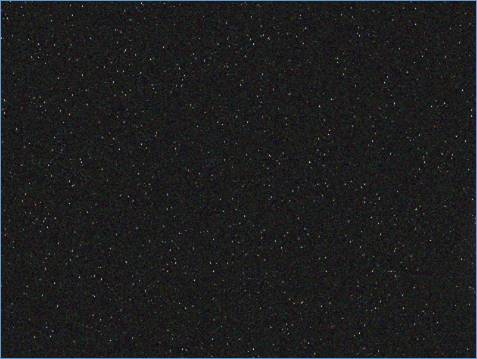
In the folder gain_100 the following dark frame set is stored:
![]()
This is an example of a dark frame. The white points are hot pixels and notice the green-blue mottled background – to best see this, magnify the document to at least 150%.
The dark frame should be applied against a capture (light) which has the same properties as the dark. Ideally, the dark frames should be captured at the same time as the image is captured to ensure settings and camera temperature are matched.
The FITS file produced can be opened by suitable software – an example of which is FITS Liberator.