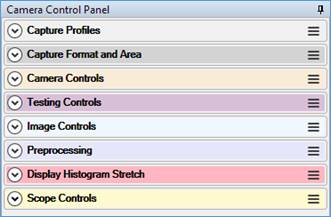
Camera Control Panel
The capabilities and available controls of the active camera are displayed in the Camera Control Panel. The groups and controls displayed can vary depending on:
· The manufacturer of the attached camera.
· The model of camera (even from the same manufacturer)
See Camera Controls for a full description. Common camera controls are described first followed by descriptions of manufacturer specific camera controls.
· The controls are grouped logically and each group can be expanded/closed as required. Each group has its own heading colour which helps you quickly identify the correct group when looking for a particular control.
Press the down arrow to the
left of the group name to expand the group and show the controls
inside it. When the group is expanded, the down arrow changes to an
up arrow, which you can press to collapse the group again.
When you expand a group of controls, you will be able to see and adjust the individual controls within the group
·
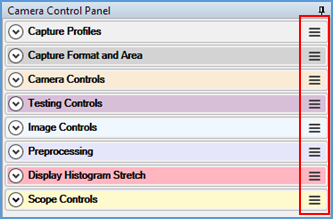
The control groups can be grabbed with a mouse and the order
re-arranged to suit user preferences. To reset the order to
default, use Options > Reset Control
Order from the main menu.
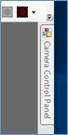
· The title bar of the panel can be used to drag the panel out of the main SharpCap form, for example to place it on a second monitor.
· The pin icon can be used to Auto Hide the Camera Control Panel, leaving it docked at the side.
|
|
|

· You can adjust the value of numeric controls by dragging the slider left or right. You can also click to the left or to the right of the current slider position – this will move the slider by one ‘tick’ mark. In the example below, clicking to the left or right would decrease or increase the gain by 50.
![]()
· A new value can be typed in for many controls. Any camera controls showing a numeric value (gain, exposure, brightness and many others) can be changed by typing a new value into the display box and pressing <Enter> or <Tab>. If a value typed in is out of range, the value will be ignored.
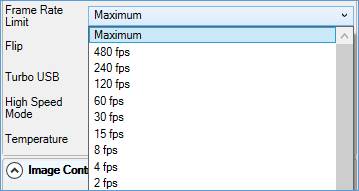
· Some controls do not have a numeric value, instead they have a range of choices from which you can select. Clicking on the control value will make the list of possible choices appear, then simply click on the choice that you want
· A few controls have a button which will carry out an action when pressed. This action might be to display more options or to adjust the camera’s white balance settings.
![]()
· Some controls are read-only. This means that you can see a value for the control, but cannot adjust it. The slider and numeric value for these controls appear in a lighter gray colour and cannot be moved or changed using the keyboard or mouse.
Controls may become read-only when set to Automatic mode, or based upon the values of other controls. Some controls, like the temperature readout below, are always read-only. Controls that are read-only will often update automatically if the value that they show changes.
![]()
Capture Profiles
A Capture Profile is a collection of camera settings stored in a text file. Various profiles can be loaded to have instant access to known collections of settings for different targets and cameras.
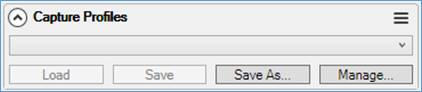
· Load – loads the values from the capture profile currently selected in the drop down and applies them to the camera controls.
· Save – takes the current values of the camera controls and writes them to the profile currently selected in the dropdown (overwrites the profile).
· Save As – creates a new profile from the current camera control values.
· Manage – shows the Capture Profile management screen, which allows you to rename, delete and set capture profiles as default.
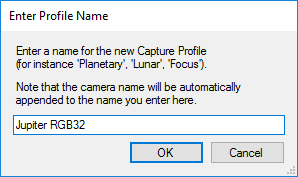
A new Capture Profile can be created by clicking Save As, entering a meaningful profile name, followed by OK.
The available stored Capture Profiles can be accessed from the drop down:
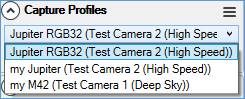
Profiles that were created using the currently selected camera are shown in bold text. Profiles that were created using other cameras are shown with the name of the camera in brackets after the profile name. You can attempt to load a profile created for a different camera if you wish – but the results may be incorrect.
Note, changing the selected item in the drop down of profile names doesn't do anything by itself, it just changes the profile used if Save or Load is pressed.
If a default profile is set for a camera then that profile is automatically loaded each time the camera is opened.
Capture Profile Management
You can manage your capture profiles by pressing the Manage… button in the capture profile area. This shows the capture profile management area.
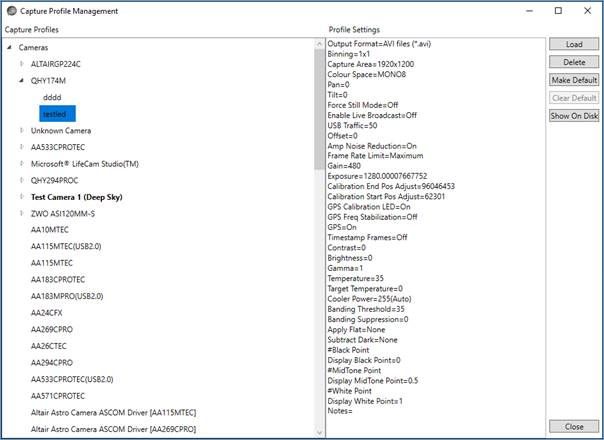
Existing capture profiles are shown, grouped by camera, on the left hand side. Clicking on a capture profile will show the settings that it contains. You can use the buttons on the right to help manage your capture profiles:
· Load – loads the selected capture profile, applying the settings to the currently open camera
· Delete – deletes the currently selected capture profile. Note that there is no way to undo the deletion of a capture profile
· Make Default – make the currently selected profile the default profile for the camera it was created for. The default profile is loaded each time the camera is opened.
· Clear Default – available if the currently selected profile is the default profile for a camera – removes the default flag for that profile.
· Show on Disk – launches Windows Explorer, with the file that contains the selected profile highlighted. You can use this functionality to (for example) transfer profiles to another computer or edit them manually or rename them.
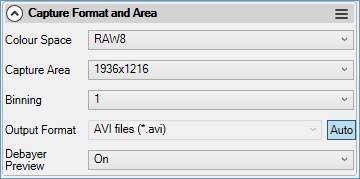
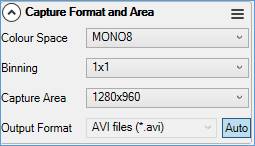
Capture Format and Area
The controls in this section allow management of the resolution, bit depth, colour space and binning of the camera as well as the save format for any captured images.
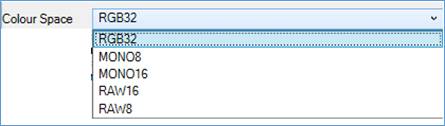
An alternate Colour Space can be chosen if required.
When the output format is set to Auto, SharpCap will chose the most appropriate save format for capture files depending on the colour mode chosen and the exposure length.
- Exposures of less than 5s will be saved into a video format.
- Exposures of 5s or more will be saved as individual frames.
- SharpCap will try to obey the preferred video and still image file formats specified in the SharpCap Settings.
- RAW images will never be saved as WMV or JPG as these formats are ‘lossy’ and would severely damage the bayer pattern data in the RAW image.
- 16-bit images will never be saved to AVI, WMV or JPG as these formats do not support high bit depths.
Camera Controls
The controls in this section allow management of the exposure, gain and other mostly hardware related features of the camera.
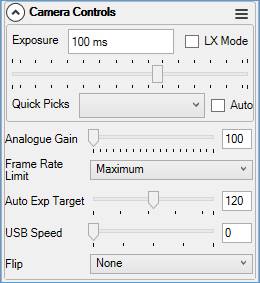
Image Controls
The controls in this section allow application of basic image processing such as brightness, gamma and contrast to the images being captured by the camera. The range of controls available is determined by the camera manufacturer/camera driver author.
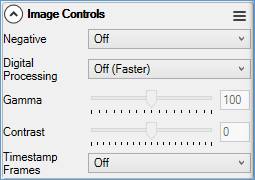
SharpCap can add a timestamp showing the date and time to captured frames from all cameras except the Virtual Folder Monitor camera. Note that the time used for the timestamp is based on the time that SharpCap receives the frame – this will be after the frame finished being captured. The time difference between the frame being captured and SharpCap receiving it depends on the model of camera in use and the camera settings.
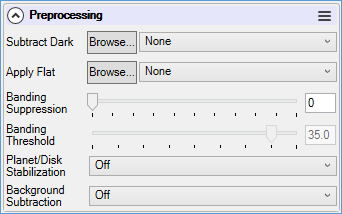
Pre-processing
You can configure dark subtraction and flat frame correction here, along other forms of pre-processing to improve image quality. Adjustments made here will affect both the image as displayed on screen and image data saved to file (except for saving ‘raw’ unprocessed frames during live stacking, which are saved without these adjustments). See the section on Pre-processing controls for more details.
SharpCap’s flat frame correction code has been designed to allow it to process images at high speed from USB3 cameras, allowing the live removal of artifacts such as dust shadows will capturing lunar/solar/planetary imaging videos. See Capturing and Using Dark Frames and Capturing and Using Flat Frames for more details.
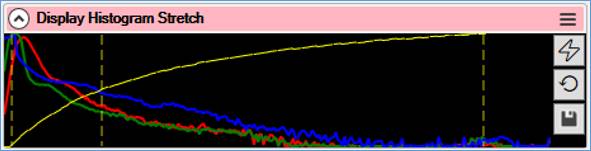
Mini Histogram and Display Stretch
This control shows an always-on mini histogram of the current image and allows the image displayed on screen to be ‘stretched’ without affecting the data saved to file when capturing. Stretching the displayed image means that the brightness and/or contrast can be enhanced, or faint detail can be brightened easily. The stretch function provides similar effects to the Image Boost options in the FX dropdown but with finer control.
Adjustments to the display brightness made here do not affect save files (except for files saved using the ‘Save’ icon within the mini histogram area, which are saved to look exactly as they do on screen).
See Mini Histogram and Display Stretch for more details.
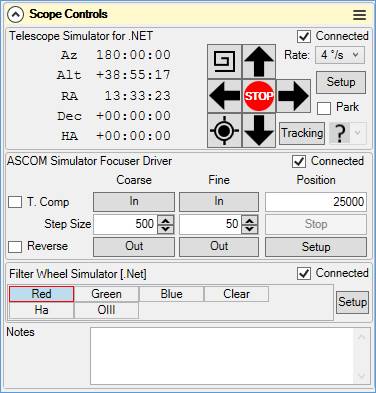
Scope Controls
The Scope Controls section contains controls that allow you to operate imaging hardware such as GOTO mounts, electronic focusers and filter wheels. These options will only appear if you have configured SharpCap to use these devices in the Hardware Settings.
More details on how these controls work can be found in the Telescope Hardware Control section.
This section also contains a Notes field – you can type any text you want into the Notes field and it will be included in the CaptureSettings.txt files that are saved alongside captured images and videos.
Note that CaptureSettings.txt files are saved at the beginning of a capture, so changes made to the Notes field after a capture has started will not be reflected in the CaptureSettings.txt file for that capture.
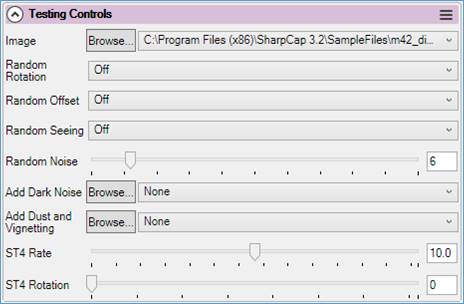
Testing Controls
The testing Controls group is specific to the two test cameras included with SharpCap. The controls allow for the simulation of atmospheric conditions, addition of simulated dark noise or dust specks and a simulated ST4 guiding port.
Other Controls
These are manufacturer dependent, examples include:
· Telescope controls.
· Thermal controls such as fan or cooler on/off.
· GPS settings.
· USB related settings which control how fast the camera tries to pump data over the USB connection.