The Menu Bar
File
The File menu item has the following options.
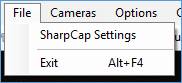
SharpCap Settings
The SharpCap Settings defaults have been chosen to enable ease of use of the application with minimal configuration required after installation, however adjustment to the settings can be made here when necessary.

See Configuring SharpCap for a detailed description of the four tabs General, Hardware, Filenames, and Startup Scripts.
Exit
Selecting Exit or Alt+F4 will perform an orderly shutdown of SharpCap.
Cameras
The Cameras menu item allows selection and de-selection of attached imaging devices. These may be cameras or video capture devices (frame grabbers).
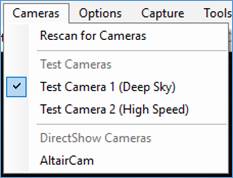
Two ‘built-in’ cameras are provided:
1. Test Camera 1 (Deep Sky), a simulation of a capture of the M42 Nebula in the Constellation of Orion.
2. Test Camera 2 (High Speed), a simulation of a capture of Jupiter (the dark spot to the lower left being the shadow of a moon).
These two test cameras can be used to learn the functionality of SharpCap without requiring a telescope and camera.
[Note: some cameras (particularly ASCOM and DirectShow cameras) may show in the device list even when they are not connected to the computer – selecting one of these cameras not currently available will give an error message.]
Rescan for Cameras
If a camera connection is lost or a camera plugged in while SharpCap is open, use the Rescan option to find the device.
SharpCap automatically rescans after a USB device is added to or removed from the computer. The rescan button is mainly useful to detect network connected cameras (i.e. Basler or Point Grey Gig-E cameras) as SharpCap cannot detect these being added to the network.
Available Cameras
Select the camera to use from the dropdown list.
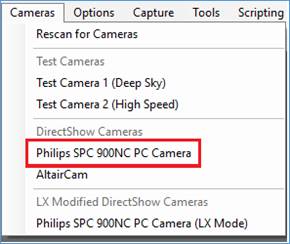
There may be occasion when a camera appears twice in the available cameras list. If in doubt which one to select, use the one highest in the list (because SharpCap tries to put the cameras it has the best control over at the top of the list). See the Philips SPC 900NC in the graphic below.
Sometimes it is useful to close the camera currently in use without opening a different camera. This can be achieved by returning to the Cameras menu and choosing the selected camera from the menu again.
Options
The Options menu item has the following items.
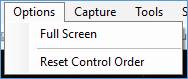
Full Screen
The Full Screen option forces SharpCap to switch to full screen mode. This leaves only the Capture Display Area and Camera Control Panel visible – there are no menu or tool bars available. To reverse this situation, move the mouse pointer to the top of the screen and the menu will appear. The Full Screen option can be unchecked.
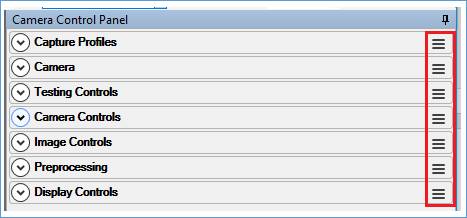
Reset Control Order
In the Camera Control Panel, each control group has a handle at the top right corner. This handle can be grabbed with a mouse and the control moved elsewhere in the Camera Control Panel to suit individual preferences. By choosing Reset Control Order, the control groups can be returned to their default order.
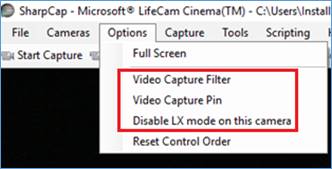
Other Options
Depending on the manufacturer/model of camera connected and selected in SharpCap, other menu items may appear in the Options menu.
These are the additional menu items available when a Microsoft LifeCam (webcam) is connected and selected.
Capture
The Capture menu item has the following options.
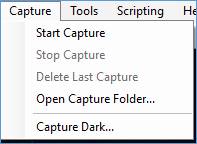
Capture allows control of:
· The capture process.
· The production of dark frames.
See Capturing Videos and Images for a detailed description of these menu items.
Tools
The Tools menu item provides access to specific functions which can assist in capturing images or ensuring alignment of the telescope.
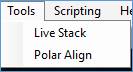
Live Stack
This option provides the same functionality as the Live Stack button located on the Tool Bar. See Live Stacking for a full description of the tool.
<ALT> < L> can be used as a hot key combination to initiate Live Stack.
Polar Align
Selecting Polar Align will produce a set of screens to manage the alignment process. See Polar Alignment for a detailed description.
Scripting
The Scripting menu item allows access to the Scripting Console and gives the ability to run existing scripts and write new scripts. The scripts are based on Python. The functionality of SharpCap can be extended by using scripting as a built-in programming language.
Scripting is an advanced topic and knowledge of it is not essential to be able to use SharpCap effectively.
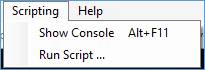
See Scripting for a full description.
Help
The Help menu item has the following options.
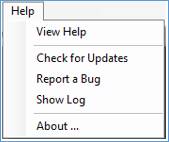
View Help
View Help will display a manual, in Windows help file format, installed as part of the of the SharpCap software.
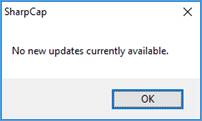
Check for Updates
Selecting Check for Updates will initiate a version check against the SharpCap website of the installed versus latest version. If no updates are available, the message below is displayed.
If an update is available, a download and installation is offered.
Report a Bug
This option provides a simple mechanism to report possible bugs or issues directly to the developer. The capture PC/laptop must have internet connectivity for this to work.
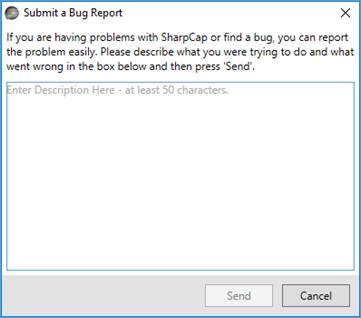
Fill in the text and press the Send button. It would be useful to provide contact details such as an email address.
Show Log
SharpCap, in the background, is constantly logging events relating to the program.
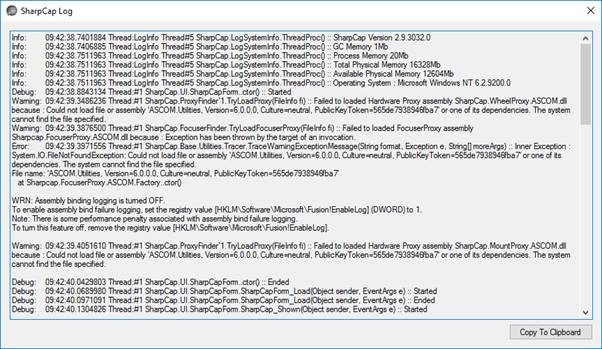
Click the Copy to Clipboard button to copy the contents of the log. By opening Notepad (or other text editor) the contents of the log can be pasted and a file saved. The information on how to send the log file can be found at http://forums.sharpcap.co.uk/ .
About
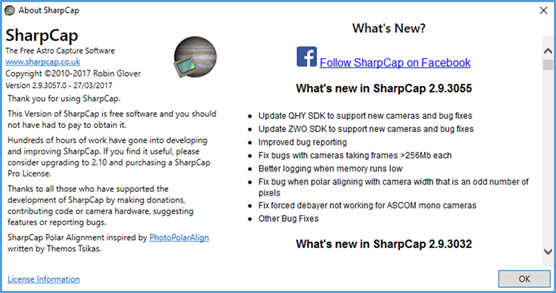
The About window provides:
· A link to the SharpCap website.
· A message informing an upgrade to a SharpCap Pro License is available.
· Acknowledgements.
· A link to License Information.
· A link to the SharpCap Facebook page.
· Version and Change history. The currently installed version shown here is 2.9.3055.