Trouble Shooting
Bugs & Crashes
Before reporting a bug or other issue make sure the latest version of SharpCap is being used as the bug could have been fixed already. Note that the Check For Updates option in the Help menu will only find newer versions that have been approved for auto-update. If no auto-updates are found, check on https://downloads.sharpcap.co.uk for newer versions that are not yet available on auto-update.
Additionally, search the forums for other users reporting the same issue as there may already be a workaround available.
Forums for reporting Bugs and Crashes and other discussions of SharpCap can be found at http://forums.sharpcap.co.uk .
How to Report a Bug
If discovering a bug in SharpCap that doesn't involve SharpCap crashing, post the following details in a new thread in the Bug Reports forum:
• A thread subject briefly describing the problem.
• A description of what was trying to be done.
• A list of the steps needed to make the bug happen.
• The contents of the SharpCap log collected after the problem has occurred.
Since the log text can be rather long, post it as an attachment rather than including it in the body of the post.
While SharpCap is running, the log text can be obtained via File > Help > Show Log. Logs are also saved in the folder %LOCALAPPDATA%\SharpCap\logs, which you can access easily by pressing the Locate on Disk button on the log window.
Alternatively, access the folder C:\Users\<user name>\AppData\Local\SharpCap\logs to find the log file after SharpCap has been closed.
How to Report a Crash
Submitting a Crash Report
If SharpCap crashes, it is most likely a message will be displayed requesting a bug report to be submitted, like the one shown below:

If connected to the
internet, press the Send and Quit
button and the bug report will
automatically be uploaded to the SharpCap bug archive.
Optionally, add a description of what was taking place when
the crash happened.
If not connected to the internet, press the down arrow next
to Send
and Quit which shows extra
options including sending the bug report by email and saving it as
a file which can be shared on the forums.
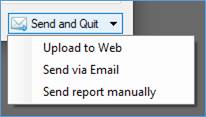
· Upload to Web – the default action when pressing Send and Quit, report is uploaded to SharpCap’s bug report server on the internet.
· Send via Email – when connected to internet (you must also have an email application set up on your PC).
· Send report manually – the generated report will be saved as a zip file ready for manual submission to the forums.
The bug report contains a description of the problem causing SharpCap to crash and the contents of the SharpCap log, both of which help track down the problem causing the crash.
SharpCap Exits without a crash report prompt
On rare occasions SharpCap may crash without showing the error report message. If this happens, tracking down the bug requires SharpCap to be re-run from a command prompt with a /dump option added to the command line like this:
"c:\Program Files (x86)\SharpCap 4.1\SharpCap.exe" /dump
Once SharpCap has been run this way, try to make the crash happen again. If the crash happens, a file called SharpCap.dmp will be created on the desktop. Unfortunately this technique only works on the 32-bit version of SharpCap.
If you successfully create a crash dump file, post on the forums including a link to the SharpCap.dmp file and a description of what was being done when the crash occurred. Dump files can be large, so provide a link to the upload – Dropbox, Google Drive and Microsoft’s One Drive are useful technologies here, there may be others.
How to Report SharpCap Freezing or Hanging
Sometimes SharpCap might stop responding to the keyboard and mouse and the screen might stop updating. If this happens, Windows may show the SharpCap window as Not Responding.
If this happens, the first thing to check is if you have just attempted some action with a piece of ASCOM hardware (i.e. Mount, Focuser, Filter Wheel, Rotator, etc). If you have just tried to move a filter wheel position or show the settings on an ASCOM driver, SharpCap could be waiting for the ASCOM driver to respond. Look for an ASCOM setup window that may be hidden behind SharpCap if you have tried to access the settings, or wait for the hardware to respond.
If SharpCap stays unresponsive for more than about 30 seconds, a window will appear prompting you to report the situation.

If you choose to report the problem then you
will be prompted to describe what you were trying to do when the
problem occurred – this information is essential to helping
understand the cause of the issue. Once you have entered this
information, you will be prompted to send the report as described
in Submitting a Crash
Report.
The SharpCap Log
SharpCap, in the background, is constantly logging events relating to the program. You can display this log using the ‘Show Log’ menu item in the ‘Help’ menu.

Click the Copy to Clipboard button to copy the contents of the log. By opening Notepad (or other text editor) the contents of the log can be pasted and a file saved. The information on how to send the log file can be found at http://forums.sharpcap.co.uk/ .
All SharpCap logs are saved to disk, which means that it is possible to locate the log files from a previous run of SharpCap if necessary. Log files are stored in the folder
%LOCALAPPDATA%\SharpCap\logs
which is a shortcut to the full name of the folder :
C:\Users\<your windows user name>\AppData\Local\SharpCap\logs
The easiest way to access the log folder is to press the Locate
on Disk button in the log window – this will open the log
folder in Windows Explorer.
Log files are named based on the time that SharpCap started, in the form
Log_YYYY-MM-DDTHH_MM_SS-XXXXX.log
with YYYY, MM, DD, HH, MM, SS representing the date and time that
SharpCap was started and XXXXX being a separate number.
The log files saved by SharpCap are simply plain text files, and can be opened with Windows Notepad (or another text editor).
USB Issues
Modern, high-speed astronomy cameras like those from Altair, QHY and ZWO are wonderful, but they do tend to push the USB system of your computer or laptop right to the limit. Sometimes they push it a bit beyond the limit and everything goes wrong, leading to strange bugs, crashes or application freezes. This post gives some guidelines and tips for avoiding USB problems or curing them if they do happen.
Step 0 - Check the settings
Some cameras have USB speed parameters, which you might need to adjust to let them use more (or less) of the available USB bandwidth in order to get satisfactory operation.
Step 1 - Back to basics
If you are having unexplained issues with a camera or other hardware the first step is to go back to the simplest setup possible. Remove any hubs, extension cables and other hardware and just connect the camera to the PC using the manufacturer provided cable. If the camera works fine like this, then other problems you are seeing are very likely caused by USB cabling issues (see later section on USB Cabling tips). If you are still having problems, move to step 2
Step 2 - Update
Make sure you have installed the latest version of the manufacturer's drivers for your device and the latest version of SharpCap or other imaging applications. This is particularly important for recently released cameras which may not be supported in older versions
Step 3 - Check the cable
It's very rare, but now and then you get a faulty cable with a camera, or perhaps the cable might have been damaged in some way. Swap the cable for another one of the same design and similar length just in case. If you have a USB3 camera, check that you have a USB3 cable (they tend to have blue plastic inside the plugs).
Step 4 - Try a different port
To get best results, your camera and your computer's USB system have to work together at very high speed. Some cameras just don't get on with particular USB ports for reasons that are not clear. If your PC or laptop has more USB ports, try switching between them and see if you get better results in a different port. It may sound weird, but it's worked for a number of people because different ports on the same PC may have different types of USB controllers running them - the one's on the right might not work so well but the ones on the left might be fine.
Step 5 - Check USB controller drivers are up to date
If you have a USB3 camera and the camera is detected but you never get an image, out of date USB controller drivers could be an issue. Go into 'Device Manager' and look for 'USB 3.0 eXtensible Host Controller' entries. If you see a version of 0.97, try to find an update for that device to 1.0 which has been known to fix this problem.
Step 6 - Try a different PC
By testing on another computer you hope to work out if the camera itself is working correctly - if it works fine on another computer then the chances of it being faulty are very slim.
USB Cabling Tips
If your device works correctly when you go 'back to basics' with a single USB cable, but fails with more complex cabling, then read through the tips in this section.
Absolute Maximum Cable Length
The maximum allowable cable length between USB devices is 5m. This means the cable length from PC to device or from PC to hub or from hub to device. You can build longer lengths by using hubs (or active repeater cables, which are basically a cable with a built in hub). So, you could have
PC -> 4m -> Hub -> 4m -> Camera
to get a total of 8m and it would have a reasonable chance of working, but
PC -> 8m -> Camera
will not work at all.
High Quality Cables will *NOT* allow you to exceed the 5m maximum length
The limitation isn't to do with signal loss along the cable, it's to do with signal timing and the speed the signals move down the cable. Cheap and nasty cables however may reduce the maximum length that works!
Practical Maximum Cable Length is *NOT* 5m
Experience has shown that while a 5m cable run will work pretty well for something with a low data rate - like a keyboard, mouse, mount or focuser, it doesn't always work reliably with a high speed USB camera. I have found that cables over 4m start to have problems for USB2 cameras and over 3.5m can give issues for USB3 cameras.
If possible, give everything its own port
By far the most reliable way to get multiple USB devices working is to take each and every device back to the PC separately with no hubs involved. If your PC or laptop doesn't have ports for this then the second best option is to use a hub for low data rate devices (mount, focuser, filter wheel, etc) and to bring the camera(s) back to the PC on separate ports.